Running JOAN and CARLA
These are the steps required from executing JOAN to driving your vehicle in CARLA. This quick guide will include a lot of references to more detailed documentation for the modules themselves. If you cannot seem to grasp what is going on in the GIFS below then please look at that documentation. Other than that, the text descriptions in this section will be minimal, and mostly GIFs and pictures! :)
Note
This quick setup guide only shows the usage of 3 basic modules namely, Hardware Manager, DataRecorder, and CarlaInterface, please refer to the
actual documentation of the separate modules if you want more info on how to set up the remaining default ones.
1. Run JOAN and CARLA
Out-of-the-box, JOAN has a couple of modules included (CarlaInterface, HardwareManager, DataRecorder, Haptic Controller Manager, DataPlotter, ScenarioManager, and the Experiment Manager). These should show up in JOAN HQ, JOAN's headquarters.
- To run JOAN, either execute (in a terminal):
python main.py
Make sure that your virtual environment is activated (each line should start with (venv)).
Or, if you use PyCharm, click the green play button or right-click on main.py and click on Run main.
- To start CARLA, open the CarlaUE4, and open your map in CarlaUE4.
Note
If you get a prompt by Unreal that says Carla was built with a different engine version, would you like to make a copy, please do not do this. But check whether you have Unreal Engine
4.24 as your active version, or open up the epic games launcher and in the top-right corner select your engine version (4.24), launch this editor and launch your CarlaEU4 project
from there.
- Hit the big play button in CarlaUE4
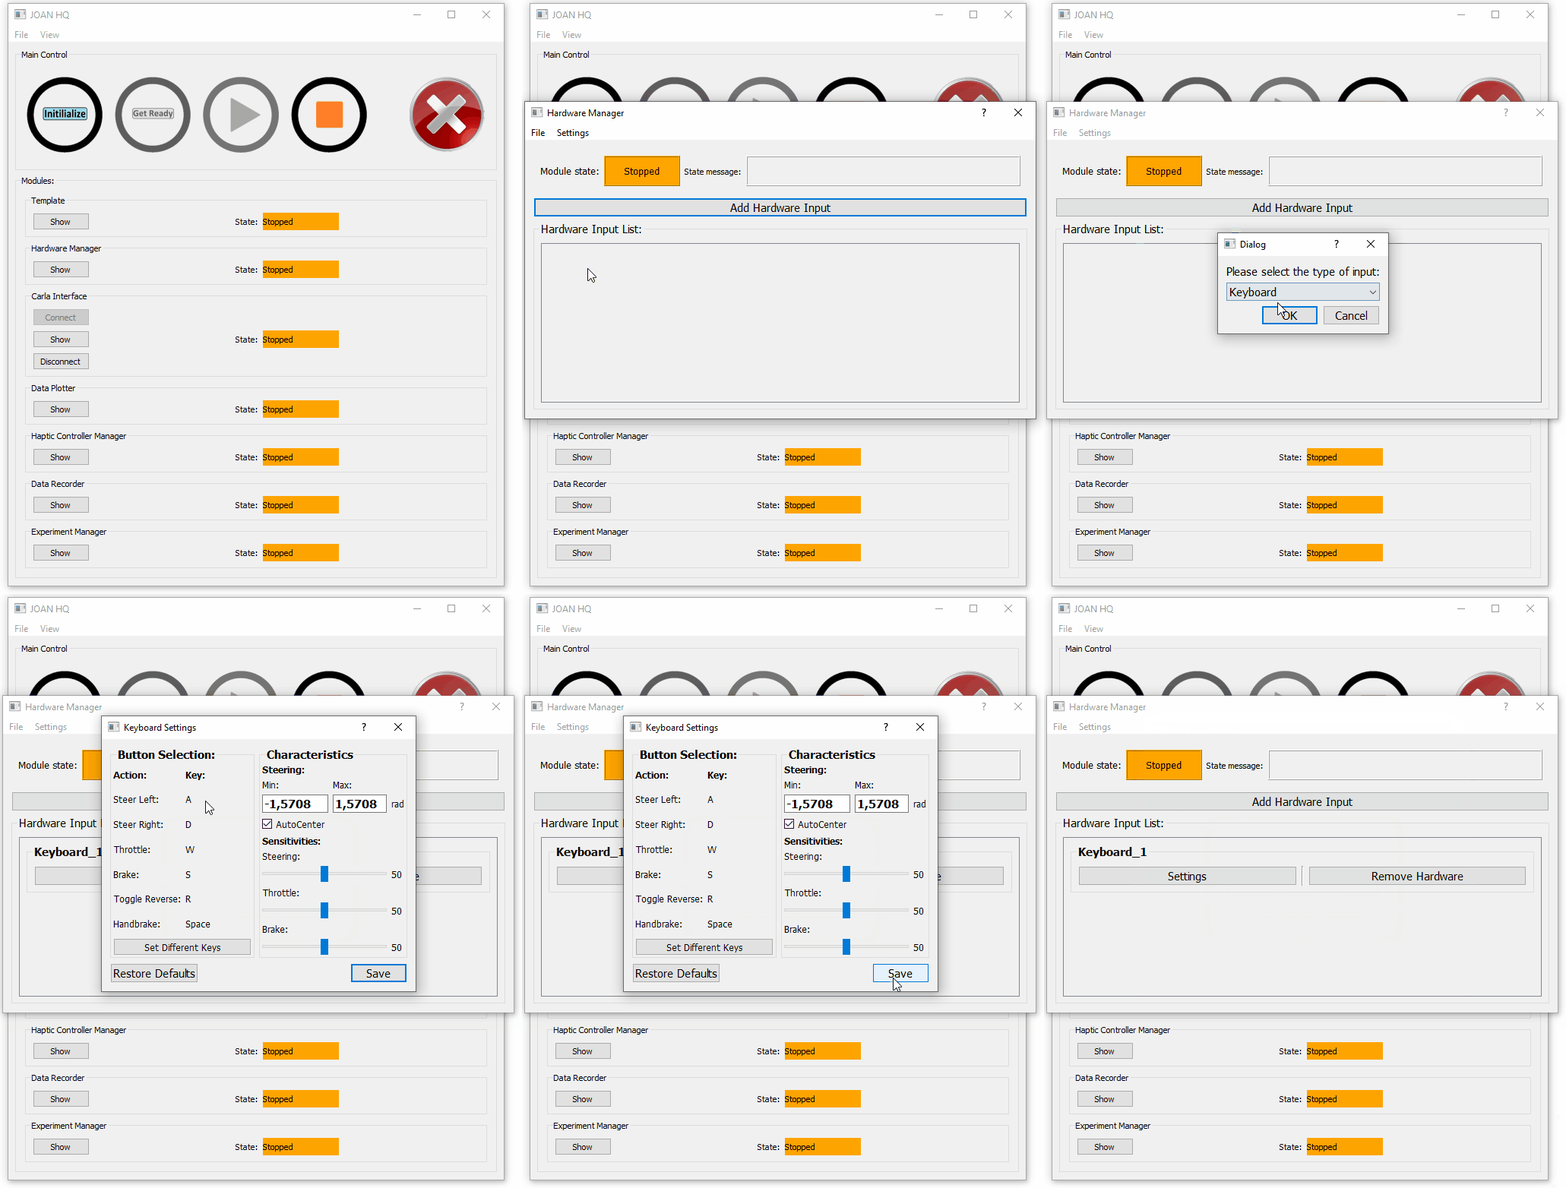
2. Add an input device
Open up the hardware manager and click the add hardware button select your input, put in the appropriate settings, and save. (For more details, please
go to using the hardware manager.
In the example below we use a Keyboard.
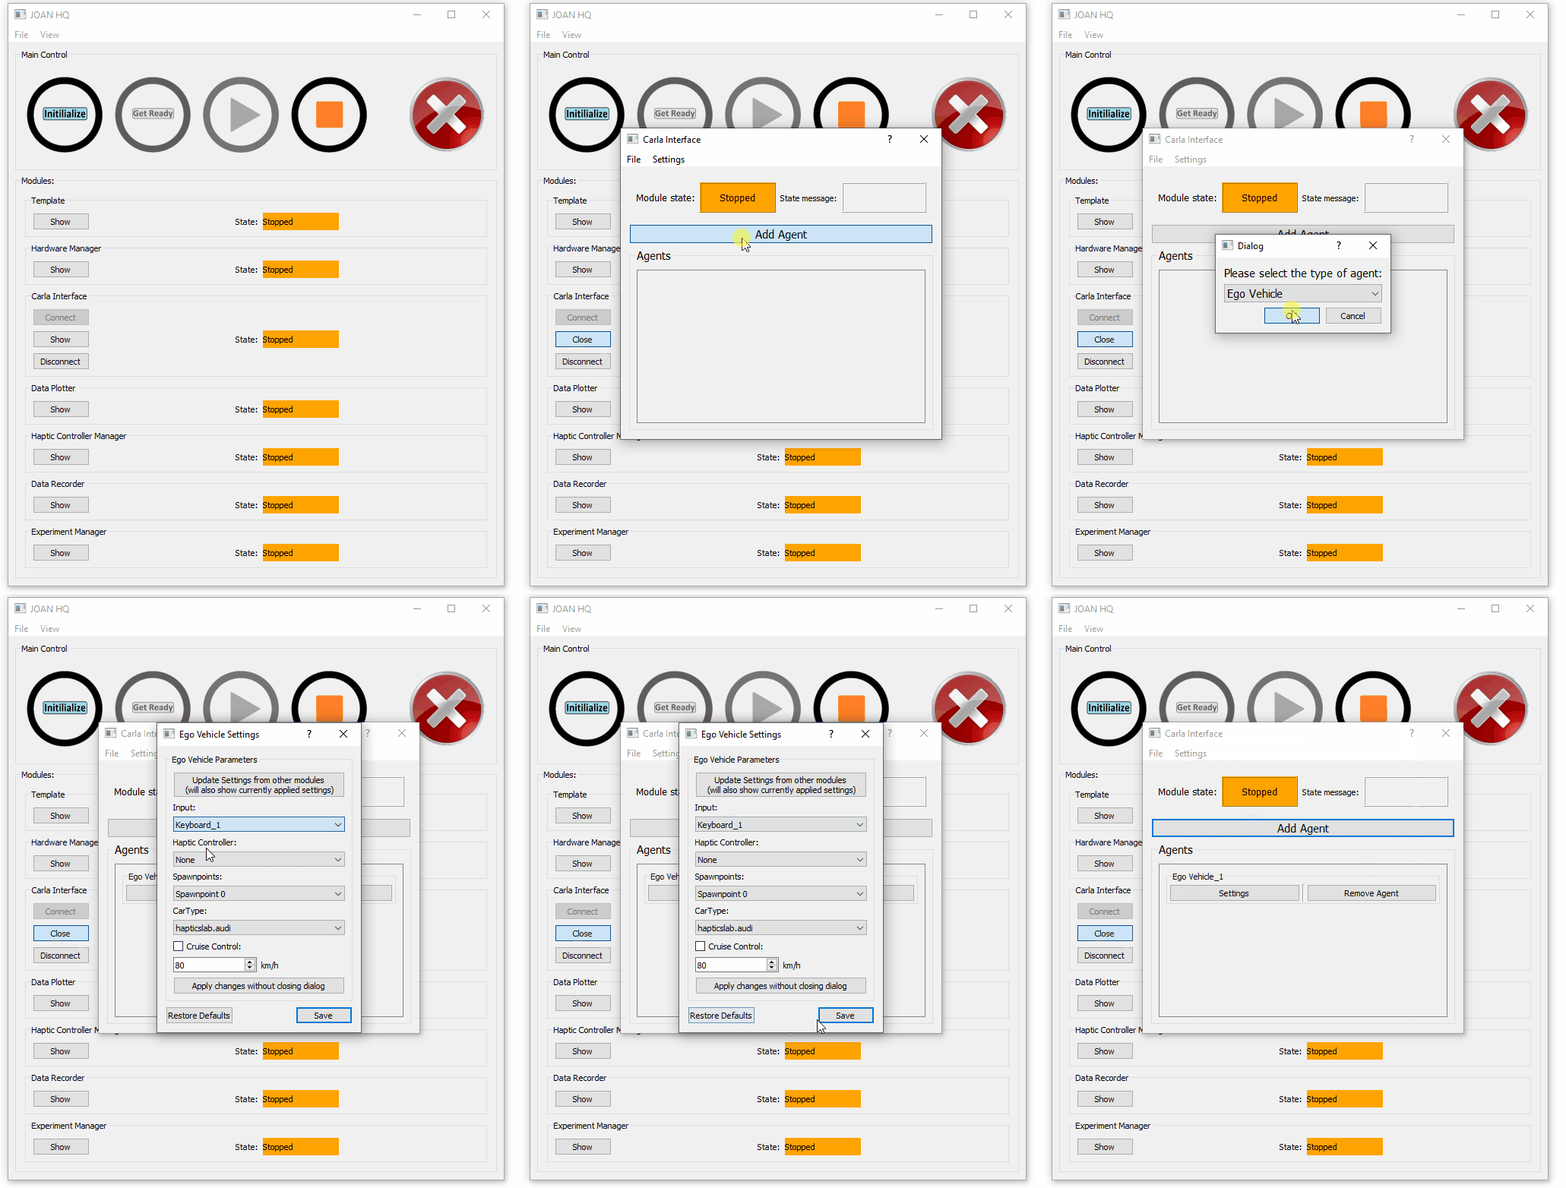
3. Add an agent
Open up carlainterface and click the add agent button, select your agent, apply the appropriate settings (for this example we use
a keyboard as input) and save. For more details please visit using the Carlainterface module.
See the gif below for this step:
4. Initialize
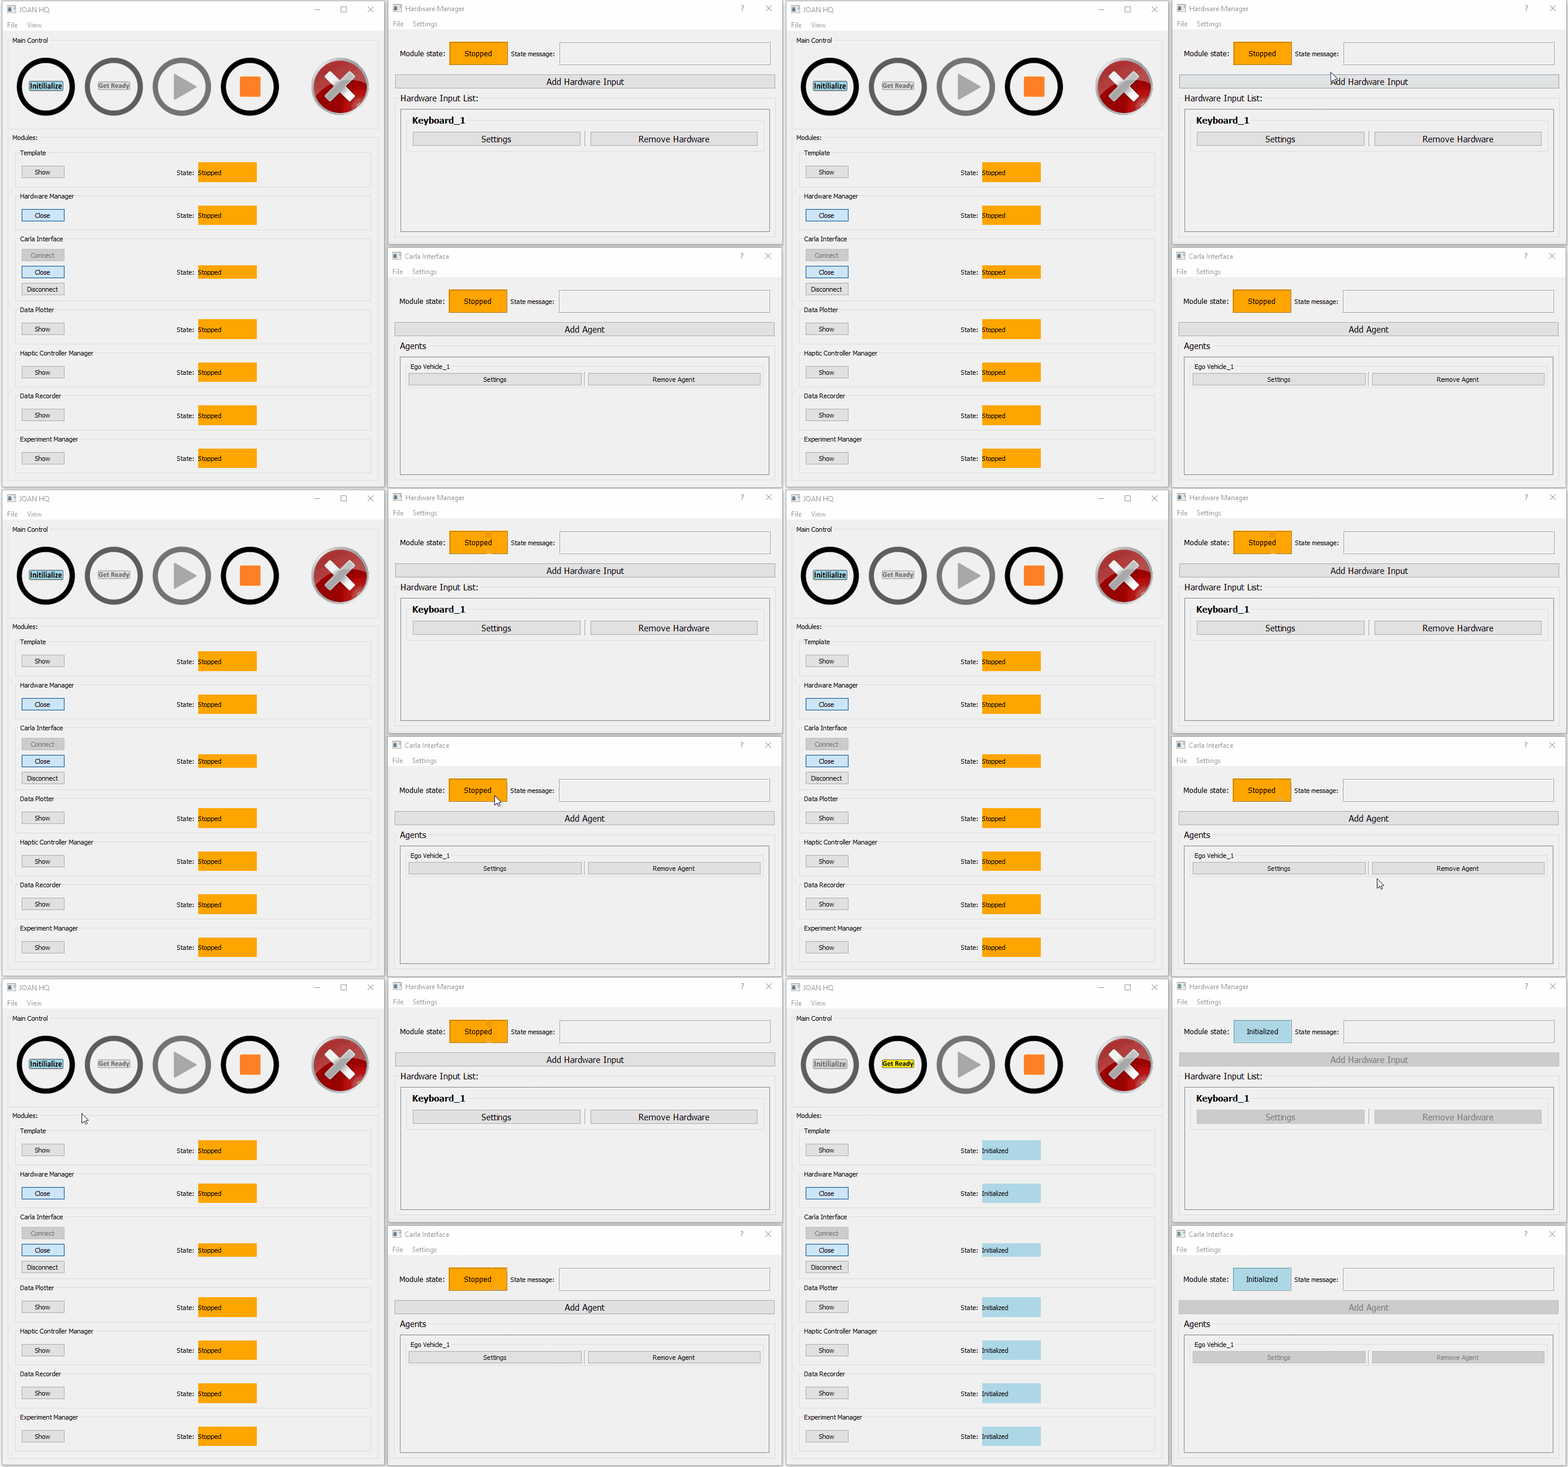
Now that we have our basic driving setup completed it’s time to initialize the modules. In the example below we still have
our included module windows open, this is not necessary but included here to show that the modules change to
the initialized (blue color) state accordingly. Going to that state is easily done by clicking the initialize button in the main JOAN window:
Note
If any code errors are found the module will go into the error state and save a log file
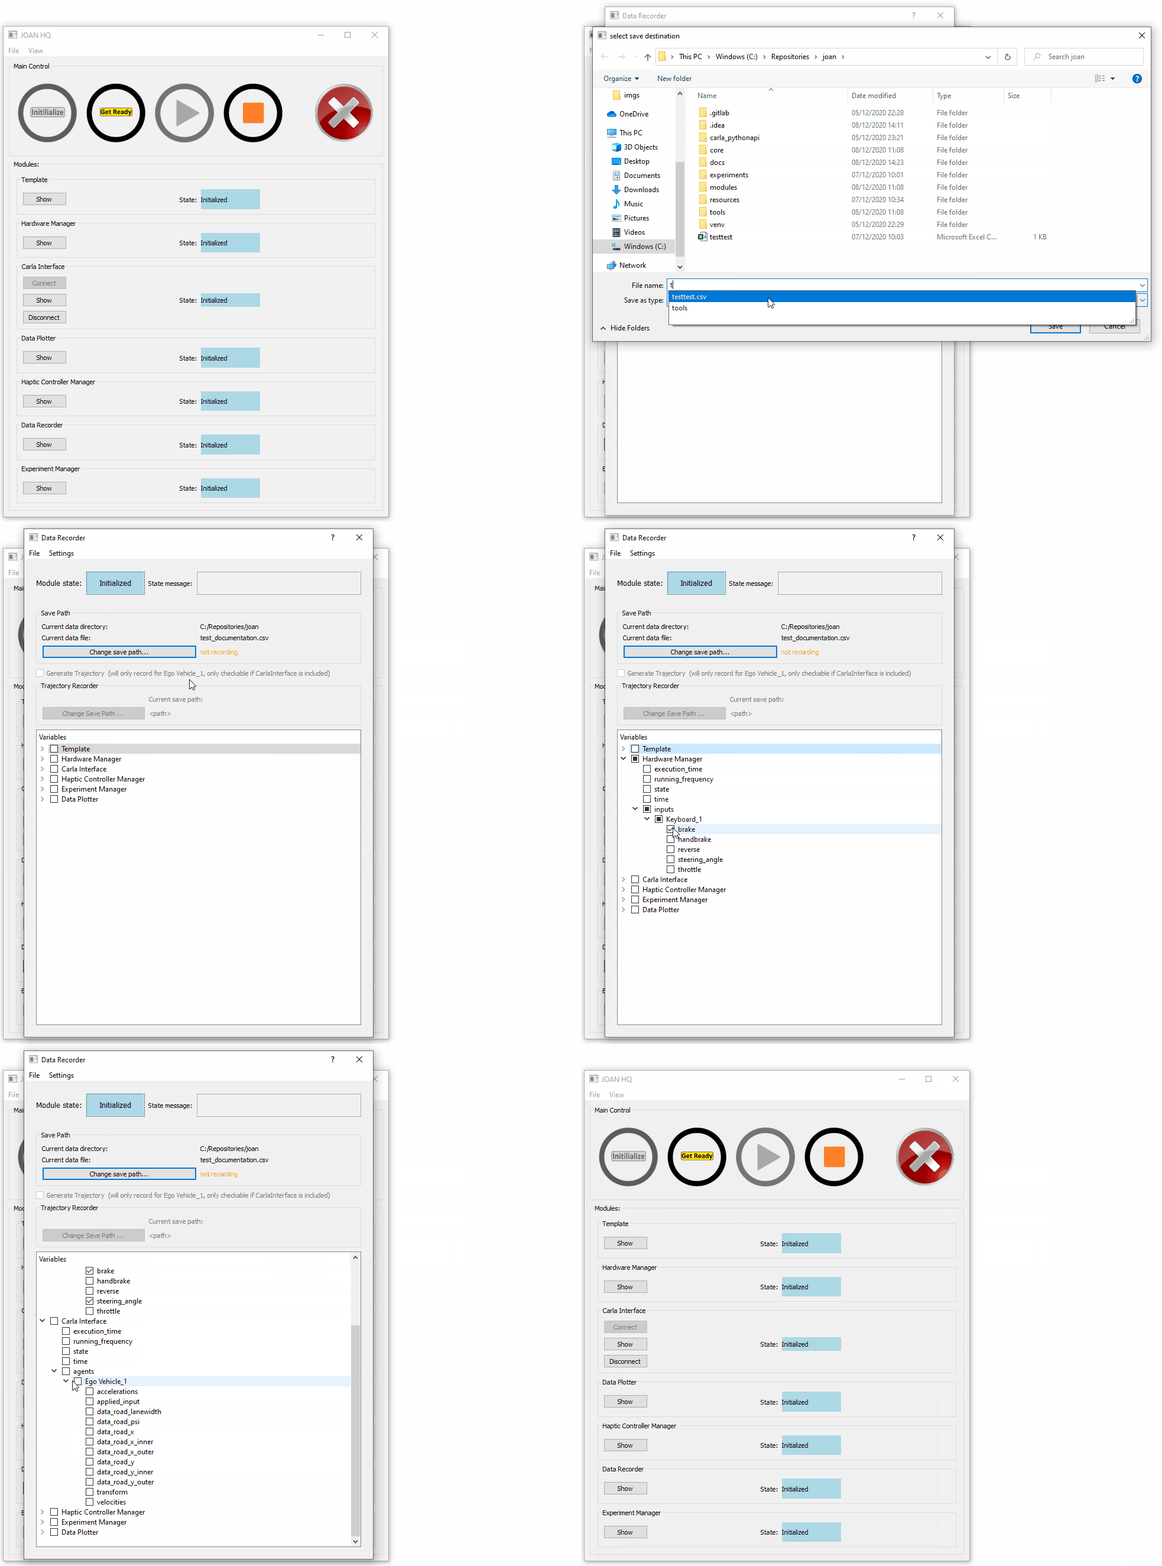
5. Setup the variables you'd like to record and where to save them in the DataRecorder
Whenever you want to record some data you'll have to set up the DataRecorder after initializing. First, we open up the DataRecorder
module dialog, then we specify our save path (where we want the .csv file to go), and lastly, we check the variables we would like
to record:
6. Get Ready
The next step is to transition to the next state, ready, as you will see in the gif below this process takes
a little while because JOAN has to create and set up all the multiprocesses and will only continue if they are
all done. This can take up to 15 seconds or so, so please be patient. You'll see the cursor also being a
circle during this time.
If everything went well you'll notice the state change from the blue initialized to the yellow ready.
7. Run and Drive!
Now the only thing left to do is to click run to go to the running state and start driving around:
If you press the stop button, JOAN Will handle everything accordingly and properly shut down
your session. (Also destroying any spawned objects in CARLA)
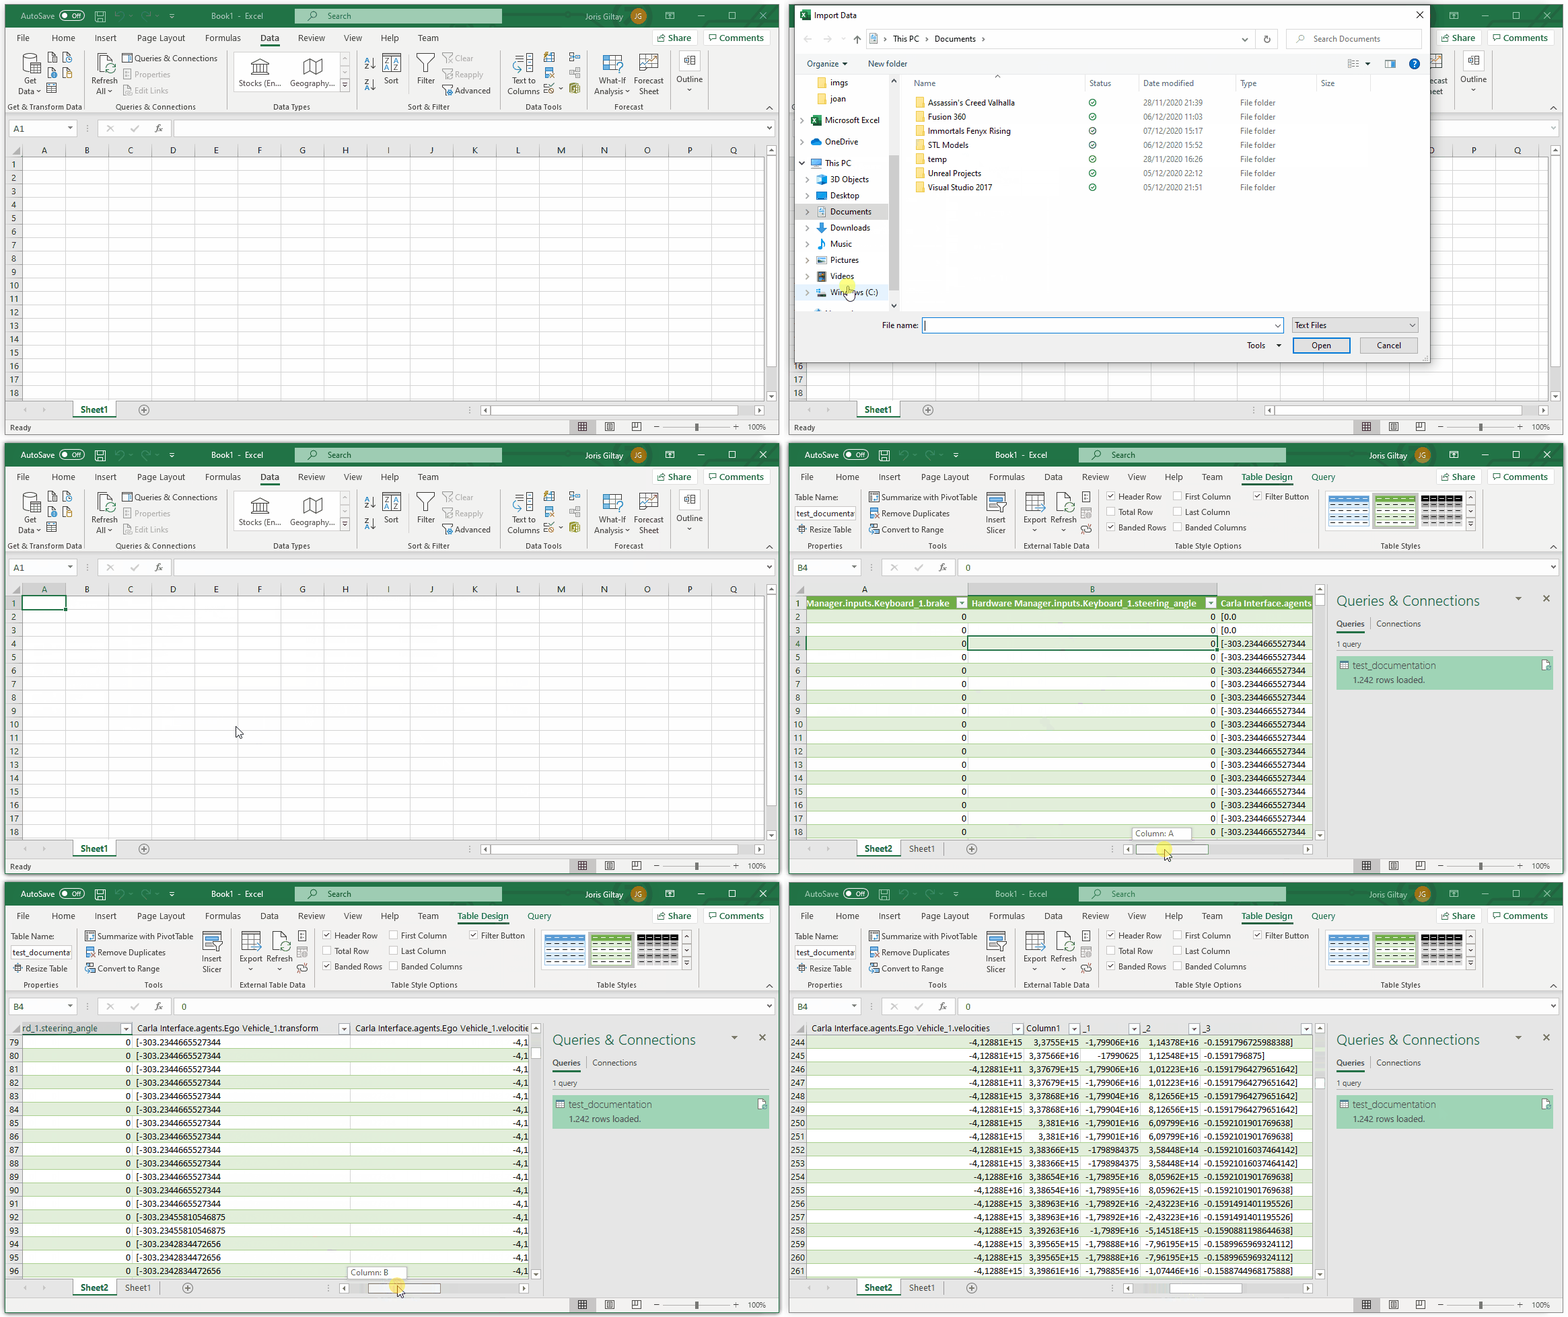
8. Have a look at your CSV file full of data.
Just to check whether we have really recorded something we can look at the generated CSV file:
